Tuesday 29 December 2009

Beer Bread

WhitneyIcon
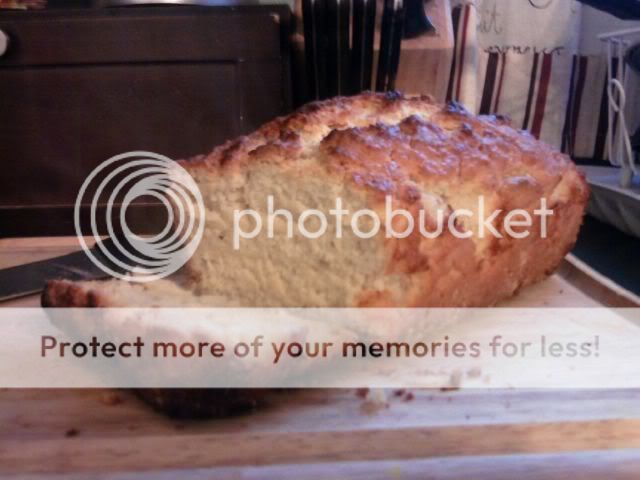
Beer Bread. It's easy, quick, tasty and no-fail bread. Make it.
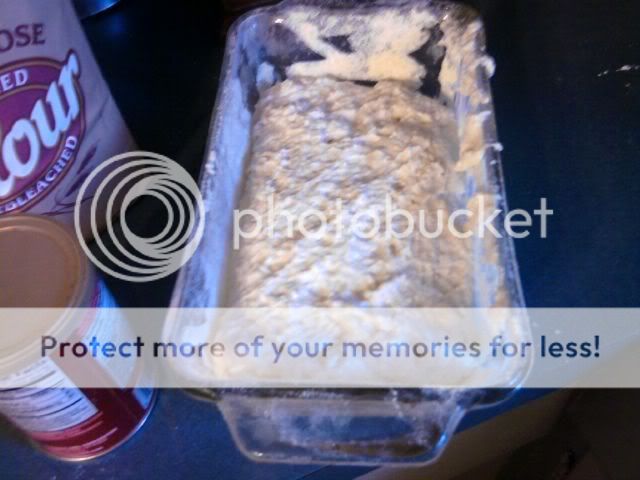
I slapped it together so it looks pretty messy, but it's going to taste awesome.

My great grandma used to make this for me when I was a little girl. :)

The recipe I'm using today is as follows:

INGREDIENTS
384g sifted all-purpose flour
3 tsp baking powder
1 tsp salt
50g sugar
340ml beer
113g melted unsalted butter

METHOD
Mix all dry ingredients then add the can of beer. Mix.
Pour into loaf pan. I butter my pan and coat it with corn meal.
Pour the melted butter over the bread.
Bake @375 °F/191 °C for 1 hour.

The result: a slightly sweet, crunchy crusted delicious bread. Mmmmm.


I also decided I wanted some honey butter to go with my bread. I blended 2 sticks of unsalted butter, a generous amount of honey, a tablespoon of cream cheese, and some vanilla scraped from a pod.

Wednesday 9 December 2009

YOUR FACE IS MADE OF BREAD

KorganIconEvery urban homesteader should be able to make bread and after 5,000 failed attempts, I've finally figured it out.


INGREDIENTS
240g warm water*
16g/2 tbsp oil
28g/2 tbsp honey
26g/2 tbsp brown sugar
10g/1 tbsp milk
6g/1 tsp salt

360g strong white bread flour
2 tsp instant/easy bake yeast

Some butter for greasing the tray.

*yeast works optimally at 30-37 °C (86-98.6 °F), above 37 °C they become stressed, according to Wikipedia.

METHOD
Combine first 6 ingredients in a large mixing bowl. Stir.
Add flour and yeast, and knead until it's mixed up well and that's all.
Place dough in an oily bowl, turning once to grease the top.
Cover with a clean towel and put in a warm place, let rise until size doubles.
Punch dough down. Knead a little and form into loaf shape.
Grease a baking tray with butter, put the loaf on it, and let rise in a warm place again until it doubles in size again.
Preheat oven to 190 °C (374 °F). Bake for 35 minutes on a low shelf.
Remove loaf from oven, allow to rest on a wire rack. When cool, slice it up, eat.

Notes:
Greasing the tray with butter works much better than oil.
You don't have to knead the dough. Let the yeast do all the work.
Getting the water to the right temperature makes a huge difference.

I don't use loaf pans but you might want to try it. In previous experiments, I've found that the middle doesn't cook well with a loaf pan and there's still alcohol left over. With this method, there's a lot more surface area for the alcohol to escape from, the taste of which indicates a less than successful bread.

Other people who write about breadmaking always say they could never go back to store-bought bread and I've always thought they were aloof for saying so. But I'm feeling the same. After you make and eat this stuff, store bread looks and tastes like shit in comparison, like they're tried to make something as bread-like as possible without actually being bread.

Friday 4 December 2009

Optimum

KorganIconThis is a dull and geeky update to my last post about pistons. I posted some diagrams for different ways to connect a rotor to a piston, like this:


The part labelled c1 is the connection from the rotor to the piston. I knew that the length of c1 had to be longer than the radius of the rotor, otherwise the machine would completely fail. To be safe, I noted on the diagrams to make c1 twice the radius at least. This is a good value, but I wanted to figure out the optimal length for c1.


The optimal length of c1 is about 1.5333r. This makes the optimal angle about 49.29°, not 45°. This is the point where you get the most angle increase for c1's length increase. This has nothing to do with the amount of force transferred, and if it does it's a coincidence. But I do think it's more efficient the greater the angle. Ideally the angle would be 90° at all times but obviously that's impossible. So, the longer c1 is the greater the angle, but 49.29° is the optimum trade between c1's length and the angle.

Here's a more accurate sketch:


Now you can sleep at night, eh?

Here's the working, if you're interested.

Thursday 3 December 2009

Pulleys and Pistons

KorganIconI have a fetish for pulleys. I find pulleys and rope very interesting. Anything involving rope usually interests me. No idea why. I know about 40 different types of knot, and I know how to bind and suspend a woman securely from the ceiling.

Last week I started to sketch out some ideas for good-looking configurations of pulleys and rope. No real use for it, just to play.
(click on any image for larger image)


This is one way you can rig pulleys to allow a small helium balloon to lift a 1 lb weight (assuming the ropes and pulleys weighed nothing). The second sketch is two equivalent pulley systems joined together. The left side uses fixed pulleys to give a 1:4 advantage; the right side uses a movable pulley to give a 1:2² advantage. So they balance.

So I started reading about pulleys, and then I read about simple machines. I decided I wanted to design a wind-powered water pump that fits onto a standard 55 gallon food-grade barrel. This barrel is a rain barrel. The idea is that the water will be pumped to a filter, and then drain back into the barrel. With the wind powering it, the barrel will be self-cleaning. The filter will be easily removed, cleaned and replaced to continue filtering. Not only will this filter the water with no effort, it should also look awesome.

So that's where I started. I watched some videos, read about simple machines and sketched a few ideas. Then I really got into it. I figured four ways to get a fan to pump a piston.

DIRECT ROTOR TO PISTON CONNECTION

ROTOR TO PISTON VIA LEVER

ROTOR COG TO PISTON COG TO PISTON

ROTOR COG TO PISTON COG (VIA BIKE CHAIN) TO PISTON

I also figured out something that took me a while to understand. A yaw. A yaw on a wind turbine is the big wing at the back of a wind turbine that turns the turbine around so that the blades always face upwind. I couldn't figure out how to connect the turbine to a piston pump while at the same time allowing the turbine to rotate 360°. I figured it out today and did a sketch.

MECHANICAL YAW MECHANISM

The yaw wind turbine sketch isn't to scale but everything is there. I don't know the proper symbols used on professional technical drawings but hopefully it's clear. The thing in the centre that looks like a box of marbles is a type of joint that allows the piston connection to rotate above the 'box of marbles', but not below it. The other 'box of marbles' above it is to allow the entire top part of the machine to rotate. Hope that makes sense.

All these wind turbine sketches are a simple one turbine, one pump setup. I had other ideas for water pumps that pump in both directions, a couple of different ways to connect 2 pumps to one wheel, and combining those ideas together to get two double pumps connected to one wheel. I haven't sketched them yet though.

I haven't included in the sketches the valves you require for the piston to become a water pump. There should be two one-way valves (or check valves) attached to the piston at the base, one that only allows water in from the water supply, and one that only allows water out to where it's to be pumped. I was going to make these but I think bought ones would be more reliable, and their reliability is crucial.

I think this level of mechanics was probably taught in many schools to young children, but I never did this at school, so it's new. Learning a new mechanical technique is like finding a different type of Lego block, and it introduces an asston of new permutations.

Friday 20 November 2009

♥ BEES

KorganIconWhy aren't you keeping bees already? There's only so many excuses, you'll eventually run out of them. Listen up:


Bees pollenate your stuff. Your garden will be awesome with bees.
Bees make honey. They frickin' make honey!
Bees make beeswax. Free beeswax!
Beekeeping gives you instant homesteader cred.

Now look here: some bees out there are having a hard time staying alive and without them, we are entirely fucked. Sure, there are other insects that pollenate but hey: aren't you listening? Bees, okay? Bees are awesome. So there's that.

Honey is absolutely amazing and delicious. If you can generate your own honey, then you are also amazing and delicious by association. What could possibly taste better than your own organic, home-produced honey?

Beeswax. I make soap. My most amazing recipe requires honey and beeswax. Best soap ever. So I can use all the beeswax I can get. That stuff can be expensive. You can make candles too, though you probably knew that. Also useful as a wood and leather conditioner. Or you can sell it.

As well as all that, bees are cool, beehives are cool, and having and running your own hive is admirable, impressive stuff. Hives can be uber-fashionable additions to any garden.

But bees sting right? Sometimes. But cats scratch and dogs bite. See where I'm going with this? You take intelligent precautions, and you won't get stung even once.

If you want to keep bees, you're going to have to read a little. There are also basic beekeeping courses you can take. Now, beekeeping isn't rocket surgery, but there's a minimum requirement of education you'll be better off with.

There are a ton of beekeeping associations around the UK. They don't make a lot of noise so you might not be aware they even exist. Here in Aberdeen, there's the Aberdeen & District Beekeepers Association. As usual, an Aberdonian organisation comes up with an awful title for itself. Their website lists free courses you can take and current info on the latest local happenings.

In fact, on January 19th 2010, they're running beginners' classes. It's a seven week course. you don't even need to enrol, you just show up at Aberdeen Grammar School at 7:30pm. I can't think of a better opportunity to learn what you need to know to get started. If you want to know more, check out their website.

Beekeeping can be very simple. You don't need to go out there and buy an asston of expensive equipment to get started. Anyone who tells you that you have to is a liar. However, you will obviously require a hive. You could find one second hand or, if you can find plans for one, you can build one. But where are you going to find plans? The Scottish Beekeeper's Association have free plans on their site for various styles of hive. Other specialized equipment can be found online for reasonable prices. Some of that too, you can make yourself.

You haven't the time to attend a course? Well, here's a free beginner's course (pdf file) you can read on when you have the time.

Now. I've told you that bees are awesome. I've told you where you can get a free education. I've linked you up. Go get those bees. And keep them.

If you just want to watch other people keeping bees and doing lots of interesting bee work, check out the Backwards Beekeepers blawg. YouTube has a lot of info too, as you'd expect.

For those guys in Arkansas who read this, check out this link to every beekeeping association in the State.

Thursday 12 November 2009

Blanket

KorganIconAbout a month ago I started my biggest yarnbastarding project to date: a blanket for Whitney. I just finished it.


It's 63" x 39". I wanted these dimensions so that the ratio of length to width would be close to φ (1.618...). This means that, when you fold it in half, it's the same shape. Just like with an A4 sheet of paper. You can keep folding it in half, it'll still be the same shape.

It took 17 balls of bulky King Cole Aero yarn, knitted with 10mm circular needles. Each row is 160 stitches. There are 204 rows. Each stripe is 12 rows. The whole thing is done in garter stitch. In total, it's 32,640 stitches. I'm guessing it took a total of 36 hours yarnbastarding.

I've no idea why knitting is supposed to be a feminine thing. I figure it's all the dainty crap that usually gets knitted. Blankets are great that way. I figure that today I make this blanket for my wife: it keeps her warm, it comforts her. Someday, it might do the same for my kid. Suddenly, it's not such a girly skill.

Now crochet? That's girly.

I got my needles and most of my yarn from Wool For Ewe on Rosemount Place, Aberdeen. I got the rest of my yarn from nerybethcrafts.co.uk.

Tuesday 3 November 2009

COMPOST PORN

KorganIconThought I'd post a few pics of composts of ours. Compost is awesome. Eggshells, coffee grounds, human hair. Delicious.


Thursday 15 October 2009

How to Build a Rain Barrel

I fitted a tap onto my rain barrel today. You can find the parts at B&Q even if their suck-ass website makes it difficult to find the parts. Here are parts you will find there:

Outside tap (£5.99):


20mm nut:


20mm wood spade bit (£7.48):


Plumber's tape(£1.93):


Drill a hole in your barrel with the spade bit at a height that makes it easy to get a watering can or bucket underneath it. If the platform your rainbarrel will rest on is high enough, you can drill a hole as low as you like.

Despite this being a non-threaded hole, you will be able to screw in the tap, forming a threaded hole on the way. You will screw it in clockwise, so wrap about 5 turns of plumber's tape anti-clockwise near the base of the screw. Screw in the tap. On the inside of the barrel, wrap more plumber's tape around the screw close to the barrel. Screw on the nut.

Keep the tap straight while you tighten the nut with a wrench. Done.

If you need to buy a 20 mm spade bit, contact me and I'll sell you mine. I bought one and drilled two holes with it and I'll never use it again.

This is how I did it and it works. If you can ask a plumber's advice, do it.

Apple Crumble

KorganIcon


Sunday 11 October 2009

TRUCKER'S HITCH

Use this knot when you need to tighten a rope to hold something down like a tarpaulin or to secure items in the back of a truck. I used three to hitch up and tether down my rain gutter. Click on images for larger images.


This knot can also be used as a crude pulley system with a 3:1 advantage if you ignore the massive amount of friction. I did this when I hitched up the HPS light in my growroom.

There are a few versions of the trucker's hitch, all of which are concerned with how the loop in pic. #3 is formed. One version uses a figure-of-eight loop, another uses a slipknot. I prefer this version because it's easier to untie. There's no knot to jam, the twist simply untwists when you untie it.

Friday 9 October 2009

Yellow for Rainy Days

I like to cook. I like baking and making pretty things. :) Today I decided to bake lemon poppy seed loaf with almond vanilla glaze. Care to join?


(Korgan says: If you're a metric-phile like me and the sight of U.S. cup sizes incites violence in your mind, look away now.)

For the lemon poppy seed loaf:
1 box of lemon cake mix
1 box of instant lemon pudding
4 eggs
1 c. water
1/2 c. oil
1/4 c. poppy seeds

Mix all ingredients, beat for 10 minutes with electric mixer, divide into 2 loaves, pop in the oven at 350°F for 40-45 minutes and POOF! Delicious lemon poppy seed loaf.


For the vanilla almond glaze:
1/3 c. butter
2 c. powdered sugar
1 1/2 tsp vanilla (I used 3 vanilla bean pods)
2-4 tbsp water
Dash of almond flavor

Heat the butter until melted. Stir in powdered sugar, vanilla and almond. Stir in water 1 tbsp at a time until smooth.


Once the loaves had cooled a bit, I poked holes in the top of them with a chopstick, then slowly drizzled the warm glaze over the top.

The cake is moist and delicious and the glaze soaks into the top wonderfully.


Remember, baking is better with cute aprons. :)